
- Go to Searchkoro.com
- Select Your Plan: To Register a Business!
- How to Add Primary Business Details ( Video)
- Category & Services: Register a Business!
- How to select Business Category & Service (Video)
- Business Hours
- How to Add Business Hours (Video)
- Social Media Platforms:
- How to Add Social Media (Video Tutorial)
- How To Add FAQs: Frequently Asked Questions
- More Info: Business Description, Tags, and Keywords!
- Media
- E-mail:
- Save & Preview:
- Pay & Publish: Register a Business!
- Proceed To Next: To register a Business
- Onboarding Call:
In this article, I will guide you on how to register a business on searchckoro.com and grow digitally. Are you a business owner? Service provider? or an expert?
Welcome to Searchkoro.com, a unique platform that is designed for local business owners, service providers, and experts to grow your businesses in the age of growing e-commerce and digital marketing.
However, to register your business, service, or yourself as an expert, follow these steps:
Note: Use your mobile phone making your device location enabled.
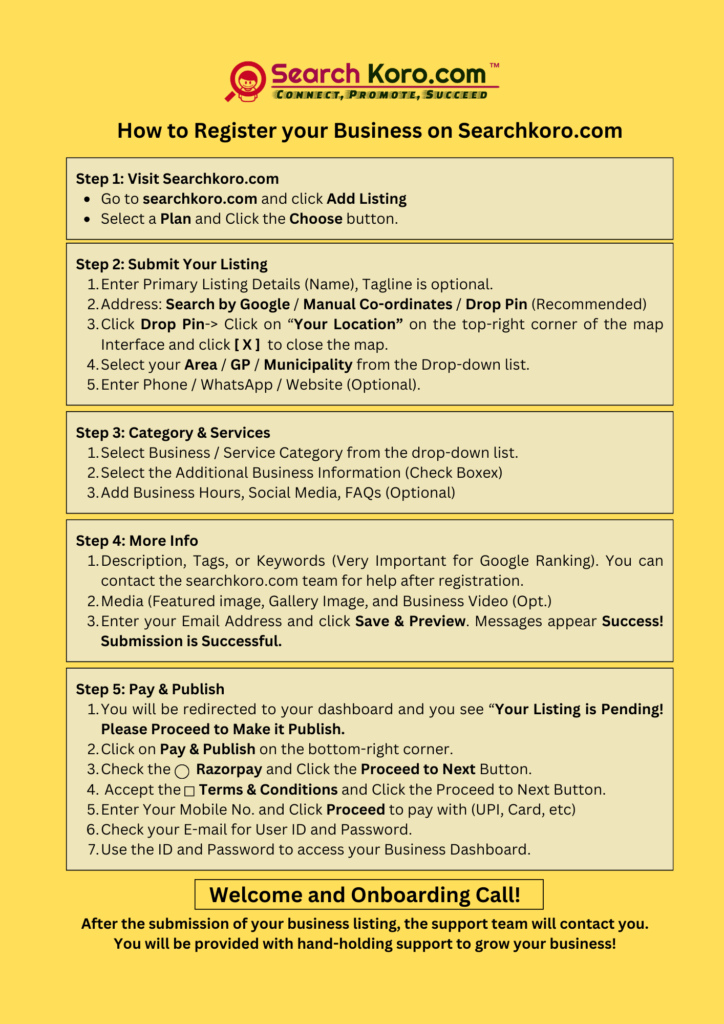
Go to Searchkoro.com #
First, go to www.searchkoro.com, click the “+ Add Listing” button, and select the suitable plan for your boutique business. There are three plans available (Premium, Basic, and Starter), and I recommend you select the premium one and click on the “Choose” button. You will be redirected to the “+Submit Your Listing” page.
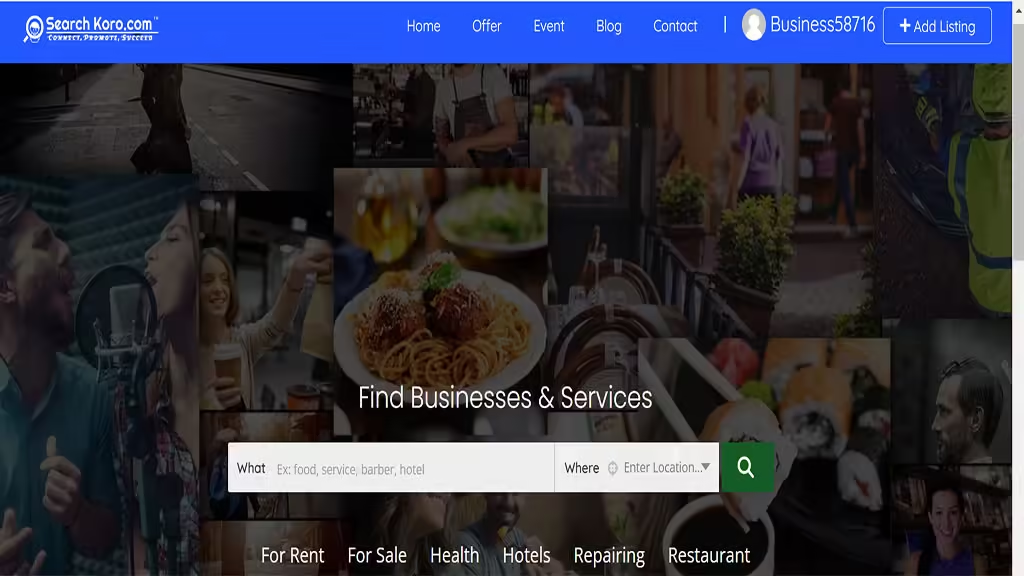
Desktop View of Searchkoro.com
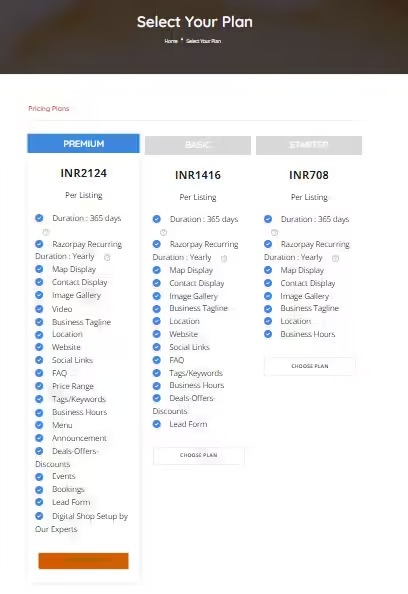
Select Your Plan: To Register a Business! #
Once you are on the “Select Your Plan” page, choose the right plan for your business. Remember that searchkoro.com is a premium business directory that offers three wonderful plans to suit the needs of your business and to register a business. You have to select a suitable plan for your business needs from the following:
- Premium
- Basic
- Starter
How to Select the Right Plan for Your Business (Video) #
After selecting a suitable plan for your business, click the “Choose Plan” button just below the plan’s features. You will be redirected to the “Submit Your Listing” page, where you have to carefully enter the following details:
Primary Listing Details: #
- Business Name, Service Name / Expert Name: Enter the name of the business or service, or your name as an expert, such as accountant, consultant, lawyer, doctor, mechanic, etc. Also, you can add the business tagline if you have any.
- Full Address: There are three options available: (Search by Google, Manual Co-ordinates, and Drop Pin), I suggest you choose the “Drop Pin” option for better results. Click on the “Drop Pin” button, a map interface will appear, then click on the “Your Location” button placed at the top right corner. Once you click the “Your Location” button, close the map interface by clicking the “x” button on the extreme top-right corner.
- Select your Area / Panchayat / Municipality: Here you can find your area by just typing the first few characters in the text box. select the place from the drop-down list.
- Contact details: Add mobile, WhatsApp number, and the website URL if you have any.
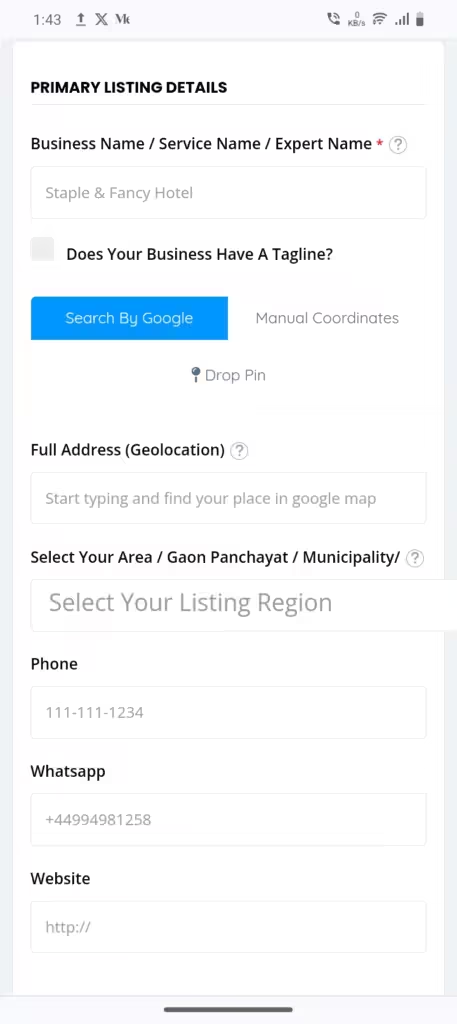
How to Add Primary Business Details ( Video) #
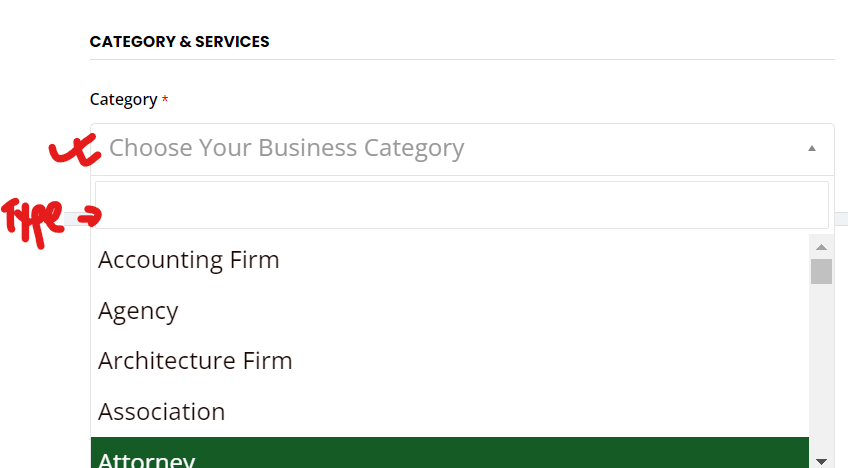
Category & Services: Register a Business! #
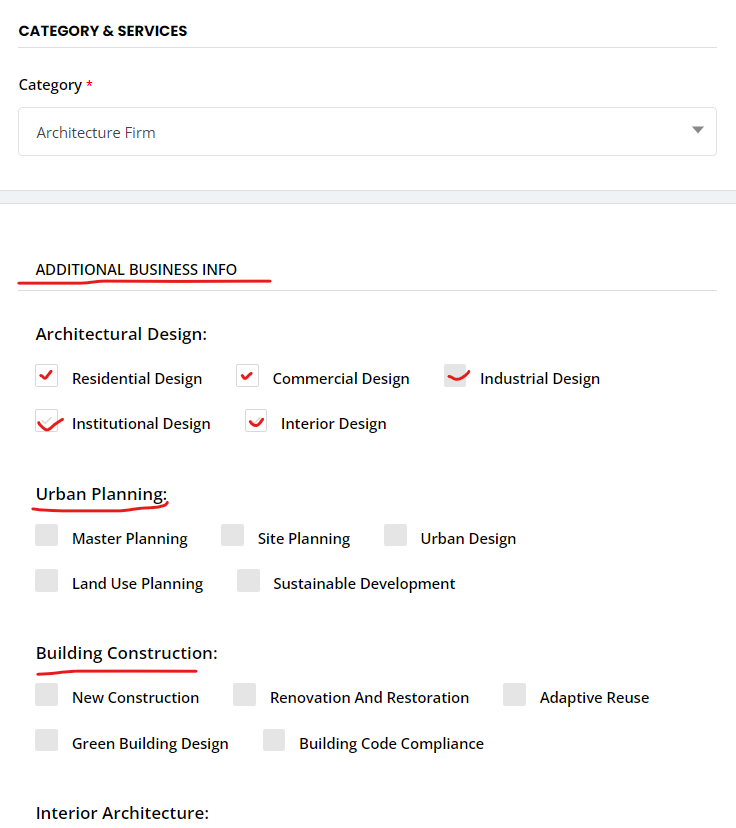
However, this section is very important for your business, select the type of business or service you are offering. Click on the text box and a drop-down list will appear, start typing the first few letters and you will find your business category.

So, after selecting the category, an additional business details list will appear, where you have to click on check the boxes suitable for your business to describe more precisely.
How to select Business Category & Service (Video) #
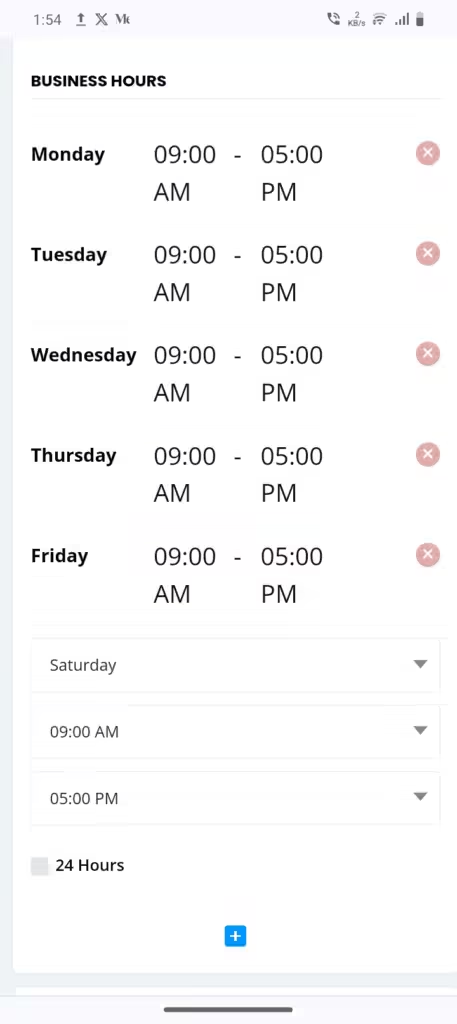
Business Hours #
Again, you can set the business hours in this section. Searchkoro.com provides a comprehensive business hour option, with weekdays and weekends to highlight your timings.
How to Add Business Hours (Video) #
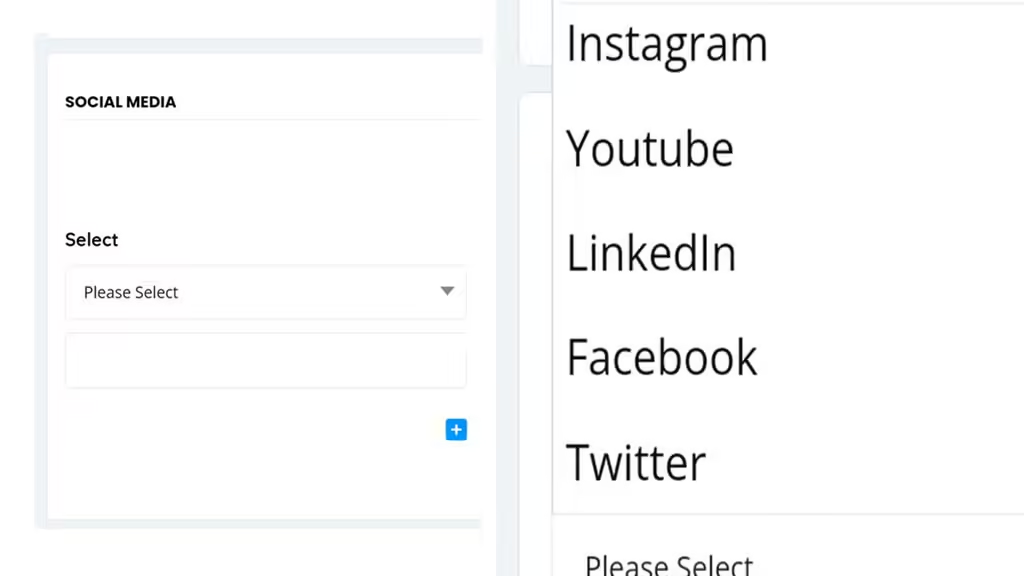
Social Media Platforms: #
Additionally, you can integrate your social media platforms with your digital storefront, so that your friends and followers can visit your store. Searchkoro.com provides the most engaging five social media platforms such as Instagram, YouTube, LinkedIn, Facebook, and Twitter. Therefore, utilize your social media to build your band online.
How to Add Social Media (Video Tutorial) #
How To Add FAQs: Frequently Asked Questions #
However, Frequently Asked Questions are helpful for business owners to filter out less-potential customers from sending enquiries, and on the other hand, buyers can make informed decisions before even visiting the shop. It also enhances transparency and builds trust.
How to Add FAQs ( Video Tutorial) #
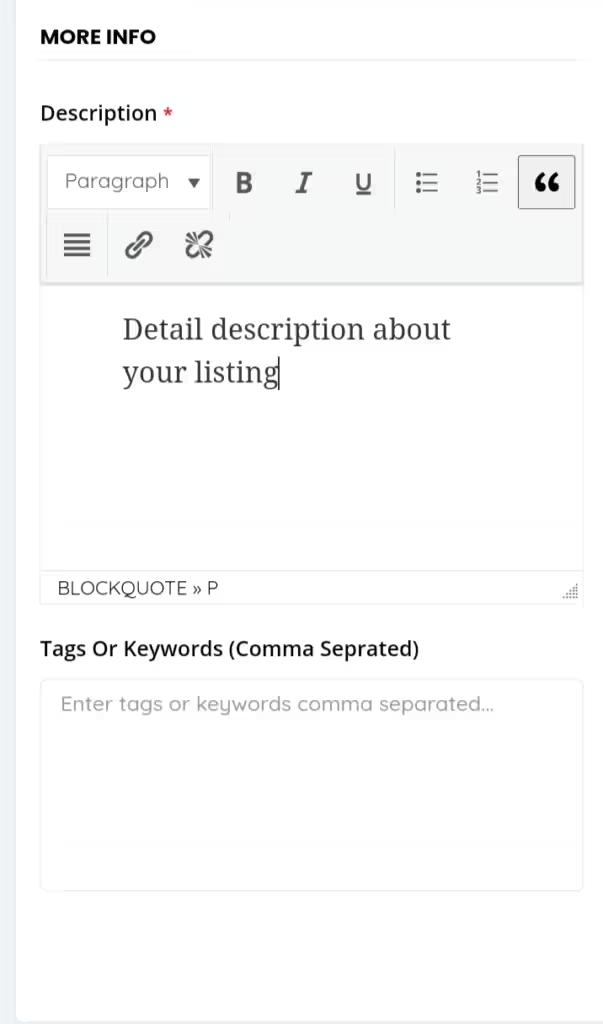
More Info: Business Description, Tags, and Keywords! #
In fact, this section is more important for your business to rank on Google, Write the description of your business carefully. If you need help in writing this section or even setting up your digital storefront, you can contact our support team to arrange an expert for you.
However, the tags and keywords are equally important for your business to get highlighted on search engines. Besides, the tags and keywords are the words and search terms that users type on Google or any other search engine to search for products or services. Writing proper keywords can help Google highlight your store on the first page of Google’s search result page organically.
How to Add More Info: Business Description (Video Tutorial) #
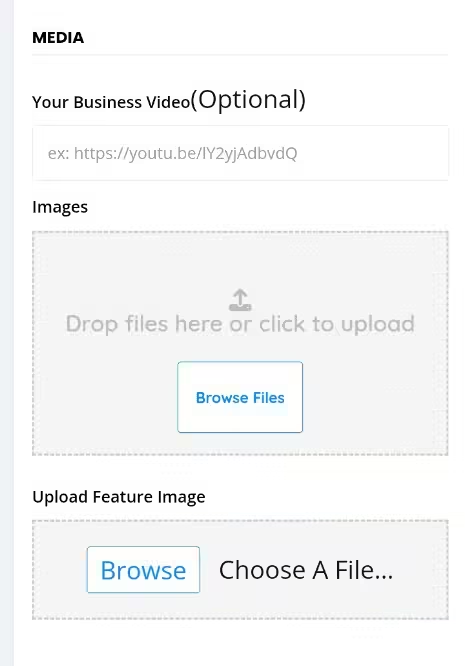
Media #
In this section, you can add a video, an image gallery, and a featured image for your storefront to make it appealing and attractive to your audiences. Remember to follow the image size and resolution guide properly, or you can contact the support team of Searchkoro.com.
How to Add Media (Video Tutorial) #
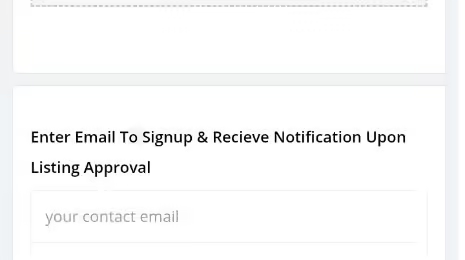
E-mail: #
Moreover, to run your digital store you need to have a working e-mail address, enter your e-mail address here and you will receive your user ID and password into this e-mail address from serachkoro.com. Once your business listing is approved, you will receive an email from serachkoro.com.
How to Add E-mail Address (Video Tutorial) #
Save & Preview: #
After entering your email ID, click the check box given just before the “I Agree” button. You will notice that the “Save & Preview” button is turned green, then click the “Save & Preview” button. You will be redirected to the newly created storefront page for your business with the details you have just entered.

Save and Preview Video Tutorial #
You see the business name appears on the page with the message ” Your Listing is Pending! Please Proceed to Make it Publish.” Check the image below.
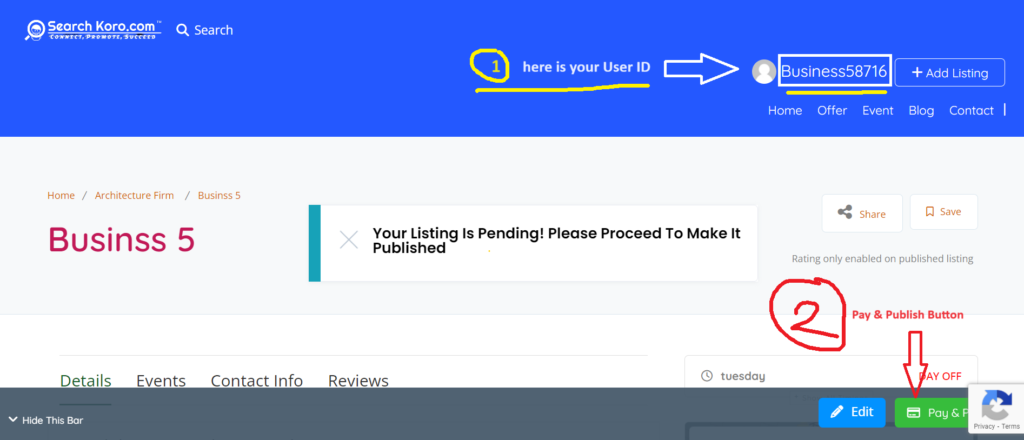
Pay & Publish: Register a Business! #
Pay and Publish (Video Tutorial: Watch Now) #
Now, to publish your listing you have to click the “Pay & Publish” button highlighted in the Red arrow on the above image. Then you will be redirected to the “Payment Checkout” page, where you have to check the “Radio Button” just before the “Razor Pay” marked in the image below and the “Proceed to Next” button turns green.
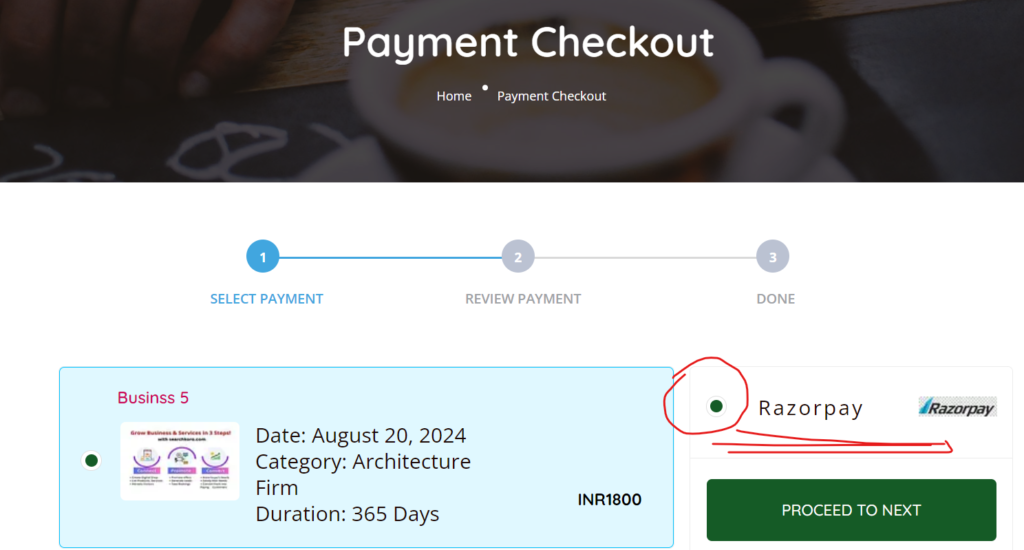
Proceed To Next: To register a Business #
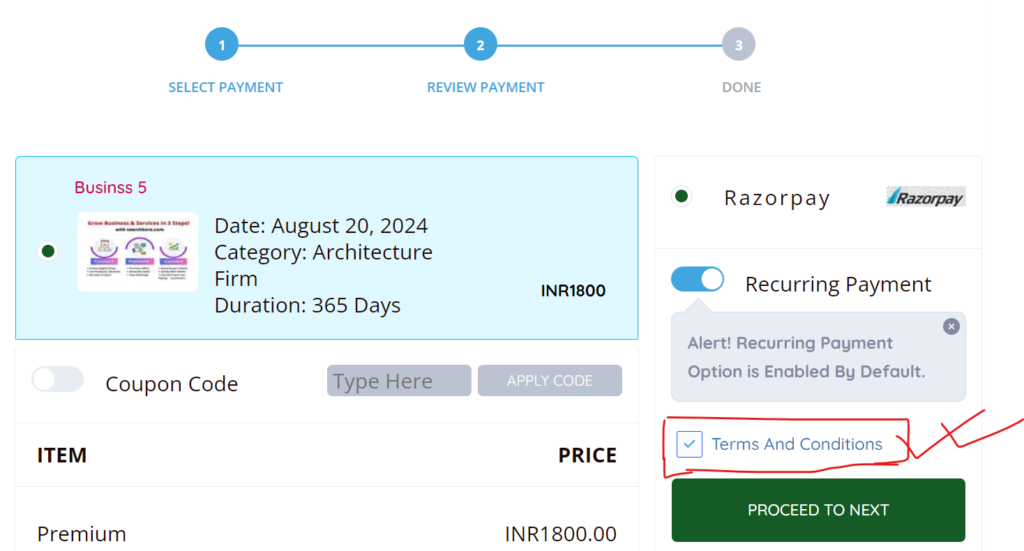
Then click the “Proceed to Next” button and you will be redirected to the next page where you have to check the “Squire Box” just before the “Terms & Condition” button as mentioned in the image below. And the “Proceed to Next” button will turn Green.
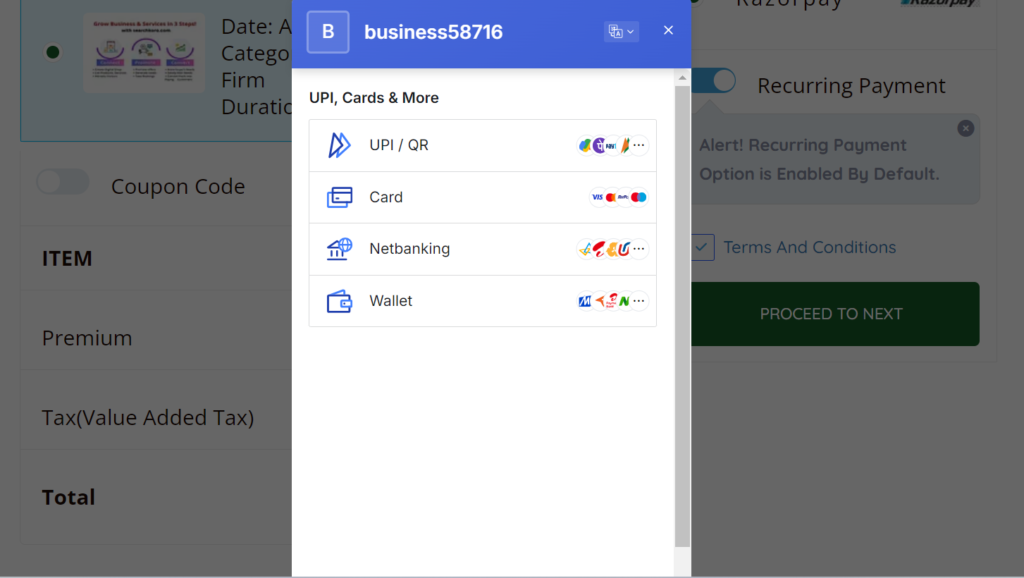
Click on the “Proceed to Next” Button and you will be redirected to the next page, where you can pay the subscription fees using Card, UPI, Net Banking, and Wallets, as shown in the image below.
Onboarding Call: #
Finally, after the successful payment process, you will get a verification call from the support team and they will accept your listing and it will be published. They will guide you further to register a business and so on.


